A Comprehensive Guide to Setting Valve Lash on a Briggs and Stratton Engine
Valve lash adjustment is a crucial maintenance task to ensure optimal performance of your small engine, such as those found in Briggs and Stratton models. Here's a detailed step-by-step guide to help you confidently adjust the valve lash for improved engine function.
Step 1: Prepare for Valve Lash Adjustment

Begin by removing the hood of the engine to gain better access to the valves.

Proceed to remove the spark plug to prepare for the adjustment process.

Carefully take off the valve cover, being mindful that oil may spill out upon removal. It's advisable to replace the gasket when reinstalling the cover to prevent potential leaks.

Step 2: Understanding the Adjustment Parts
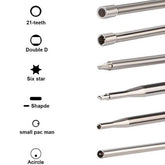
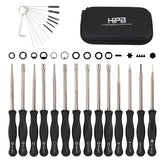
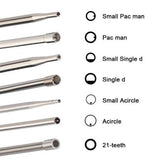
Locate the center screw with a Torx head, which locks the outer hex nut in place for adjustment.

To set the valves in the correct position, rotate the engine clockwise while ensuring both rockers have some slack or valve lash.
Step 3: Adjusting the Valve Lash
Insert a small wood or plastic dowel into the cylinder to feel the piston's position. This prevents damage to the piston during adjustment.

Slowly and carefully revolve the engine while monitoring the piston's movement using the dowel.
Reach the top dead center and slightly rotate the engine further until you feel the pistons begin to descend.
Check the rockers; if they move easily by hand, you are in the correct spot. If one remains tight, repeat the process to find the right stroke of the engine.
Use feeler gauges to measure the gap between the rocker and the top of the valve based on manufacturer specifications. Adjust the valve lash accordingly.

Step 4: Finalizing the Adjustment
Ensure the valve clearances match the specified measurements, typically provided in the manual or online for your specific engine model.

Loosen the locking Torx screw, adjust the nut until the gap is correct, and then tighten the locking screw.
Recheck the gap with the feeler gauge and repeat the adjustment process if needed until satisfied.
Perform the same process for the other valve and double-check that all locking screws are tightly secured.
Reinstall the valve cover, replace the spark plug, and finalize the adjustment process.
Performing a valve lash adjustment may seem intimidating at first, but by following these steps methodically and attentively, you can successfully adjust the valve lash in your Briggs and Stratton engine, ensuring efficient engine operation and longevity. Remember, patience and precision are key to a job well done.
Check out the video below.
https://www.youtube.com/watch?v=1ibRIZx5KRQ


