


HOW TO Fix A Leaking Snow Blower Carb in BRIGGS and TECUMSEH Engines
For most snow blowers or 4-stroke engines, there is a float bowl on the bottom of the carburetor which works as the back tank on your toilet. It has a float and it is attached to a valve when you flush your toilet, the water level drops down and flushes your toilet then that back tank starts filling up with water again.
Reasons
You can just pull the float on the carb off. It fills up with fuel as the lever of the fuel in the bowl gets higher and higher. It fits the float up and the float floats and as it gets to the top then it will shut the valve off, so it does not flood out anymore and that is why your carb floods out.
It is because the needle in the float valve in the carb is not sealing or it is not coming together properly and sealing. Briggs and Stratton, and Tecumseh engines have a removable or replaceable needle and seats in them especially that seat we are talking about not like a Honda-style carburetor where you can not replace the seat.
How To
1. Pull the pin out and do not lose it, make sure you keep it somewhere safe but then when you pull the float off, the needle comes out and you will see that there is no rubber or Viton tip on the needle that it is just a metal tip on that, it meets down into the seat which is a rubber seat. If you can see that sometimes they are brown, sometimes they are green. But it is a replaceable seat, you can buy a new Briggs and Stratton needle and seat kit.
2. Get the old needle out. The easiest way to do that is to use an air compressor. If you heard it went pop, that means it worked. Sometimes they are glued in there like they are really stuck badly, you can use a little tiny carburetor adjusting screwdriver or something like that to get down in there and dig it out.
3. Install the new needle and seat. You have to insert the new seat into there. The easiest way to do this is to use another side of a chainsaw file rather than the sharp end. Make sure that it actually fits down that hole before you try this. Now you have to pay more attention to the new seat. If you look at it closely, you will find one side of it has a grove and a little ring and groove around it. And if you look at another side, there is no groove on it. You just need to put the seat on there so that you can see the groove is on the top, then take your carburetor and push that in.
4. Install the new needle. You need to put it on there and drop that on, then put your pin back in.
HIPA CARBURETOR REPAIR KIT
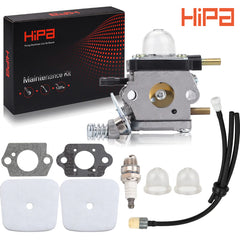
Click here and BUY IT NOW: Hipa Carburetor
Please let us know if this works and if you have any suggestions or comments. Or you can join HIPA DIY COMMUNITY to feature your passion for repair projects, share your stories with the Hipa family and get help from Hipa.


