How To Replace The Ignition Coil On A String Trimmer

This blog provides step-by-step instructions for replacing the ignition coil on a Husqvarna string trimmer. The most common reason for replacing the coil is if the engine won’t start or run.
Replacement
Before you replace the ignition coil in your string trimmer, make sure the engine has cooled. And remove the wire and boot from the spark plug to prevent the engine from accidentally starting.
Step 1: Use a t25 Torx bit to unthread the mounting screw securing the throttle housing. Next, loosen the clamp screw and two screws closest to the trigger. You can now slide the drive shaft out and detach the throttle housing.
Step 2: Now unthread the screws securing the muffler, and detach the cover. Next, remove the screws to release the muffler shield. Remove all of the screws, so you can separate the two halves of the engine housing.
Step 3: Now disconnect the wire from the ignition coil terminal. Make sure the flywheel magnets are rotated out of the way. Then unthread the mounting screws to release the coil. Push the spark plug boot through the access hole to fully remove the old coil.
Step 4: Install the new ignition coil by aligning it on the mounting bracket then push the spark plug boot through the access hole. Thread and tighten the mounting screws and be sure to secure the eyelet wire under the rear screw.
Step 5: Now align the flywheel magnets with the coil. Place a business card between the coil and the flywheel. Then loosen the screws to align the coil to the correct distance from the magnets. Tighten the screws and remove the card. Position the spark plug wire and connect the coil wire the terminal.
Step 6: Position the spark plug wire and connect the coil wire to the terminal. Join the two halves of the engine housing together. Rethread all of the screws to secure, realign the muffler shield and secure it with the screws. Realign the muffler cover and rethread the screws to secure. Reposition the throttle housing and slide the driveshaft through the housing until it locks into place. Rethread the mounting screw then tighten the other screws.
With the repair completed, attach the wire and boot to the spark plug and your string trimmer should be ready for use.
Hipa Repair Center has a solution for many of the problems you may be experiencing with your lawn and garden equipment. Enter the product’s full model number in our website search engine for a complete of compatible parts. Hipastore.com also has an extensive selection of instructional blogs to assist you covering topics like part replacement. At hipastore.com, we make fixing things easier.
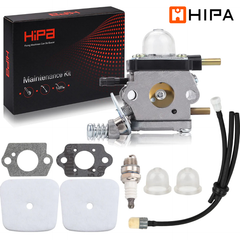
Revive Your Machine With Hipa All-In-One Kit
Please let us know if this works and if you have any suggestions or comments. Or you can join HIPA DIY COMMUNITY to feature your passion for repair projects, share your stories with the Hipa family and get help from hipastore.com.


