Flywheel Key Replacement On A Small Engine

This blog is a step-by-step instruction for replacing the recoil starter on a Honda lawn mower engine. The most common reasons for replacing the recoil starter is if the engine won’t start.
Replacement
Before you begin the replacement, you need to make sure the engine has cooled.
Step 1: Use the 5/16 inch nut driver to unthread the two mounting screws securing the air filter cover. Remove the cover and the air filter, then unthread the screws securing the filter base. Pull the choke lever off so you can move the base out of the way
Step 2: Use 5/16 inch nut driver unthread the two screws securing the throttle cover plate. Shift the throttle lever to the right so you can detach the plate.
Step 3: You can now unthread the three screws securing the blower housing by using a 10 millimeter socket. Set the blower housing aside and detach the spark plug wire and boot from the spark plug.
Step 4: Use the 5/8 inch spark plug wrench to help unthread the spark plug. You have to make sure the engine piston is in the down position. Then insert a cord into the cylinder to prevent the piston from moving.
Step 5: You can now use the 15/16 inch socket and a mallet to loosen the flywheel mounting nut. Fully unthread the nut and remove the starter cup and fan.
Step 6: Your next step is to use the dedicated flywheel puller to detach the flywheel. Rethread the mounting nut on the engine shaft. Position the flywheel puller and thread the bolts into the flywheel. Use the half inch wrench to help tighten.
Step 7: Next, thread the rear nuts so they are flush against the flywheel. Now tighten the front nuts until the flywheel becomes detached. Remove the puller, unthread the nut and you can slide off the flywheel. If it is still intact, you can now detach the old flywheel from the engine shaft to install the new flywheel key.
Step 8: First you need to reposition the flywheel on the engine shaft. Now insert the new flywheel key, align the fan and the starter cup then thread and tighten the nut. Using a 15/16 inch socket or a torqie wrench to torque the nut to 60 foot-pounds.
Step 9: Remove the cord from the cylinder and rethread the spark plug. Be careful not to damaged the threads by over tightening. Reattach the wire and boot to the spark plug.
Step 10: Now reposition the blower housing and rethread the three mounting screws. Reposition the throttle cover plate and rethread the screws. Insert the two mounting screws through the air filter base. Then align the base and thread the screws into the carburetor. You also need to replace the choke lever.
Step 11: With the pre-cleaner positioned in the cover followed by the air filter with its rubber gasket facing outward. Align the cover on the base and secure it with the screws.
The engine now should be ready for use.
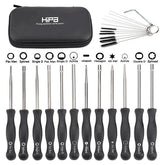
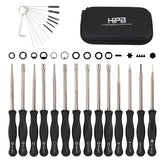
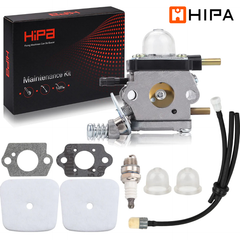
Revive Your Machine With Hipa All-In-One Kit
Hipa's parts kits make it quick and easy to maintain or restore your lawn and garden equipment. Whether you need replacement parts, tools, or help, Hipa has the small machine solution for you.


