Throttle Cable Replacement On A String Trimmer
This blog is a step-by-step instructions for replacing the throttle cable on a string trimmer. The most common reasons for replacing the throttle cable is if it is broken or damaged, causing the engine to not rev up when the throttle control trigger is pulled.
Replacement
Before you replace the throttle cable on your string trimmer, you need to first make sure the engine has cooled and remove the wire and boot from the spark plug to prevent the engine from the accidentally starting.
Step 1: Remove the handle screws and separate the two halves of the handle. Note the orientation of the spring then lift the throttle control trigger out and remove the spring.
Step 2: Now rotate the trigger to release the throttle cable.
Step 3: Next loosen the screw and remove the nut securing the handle mounting clamp to fully release the handle.
Step 4: Pull both the on/off switch and the throttle cable out of the handle.
Step 5: Now rotate the knob to release the air filter cover. Then hold the throttle arm then push on the throttle cable to detach the end of the cable from the swivel. You can use pliers to lift out the cable.
Step 6: Pull the wire retainer outward to release the wires from the engine housing. Disconnect the wires and loose the locking nut to remove the old cable assembly. Prepare the new throttle cable assembly for installation by first transferring the adjustment nut and locking nut from the old part to the new one.
Step 7: Now correctly position the slider knob on the new on/off switch and secure it with the screw. You need to make sure the adjustment screw is properly positioned on the cable threads inserted into the slot on the starter housing and tighten the locking nut.
Step 8: Rotate the throttle arm and confirm that the swivel is properly aligned. Then insert the cable into the swivel and fully seated. Be aware that if the throttle cable is too tight, you can adjust it by repositioning the adjustment nut.
Step 9: Connect the wires and position them under the retainer. Make sure the air filter is fully seated in the cover. Then realign the cover and rotate the knob to secure
Step 10: Insert the on/off switch into the slot in the right side of the handle and secure the wires in both the handle and behind the retaining clip on the engine casing.
Step 11: Now align both the wires and throttle cable in the groove on the handle. Position the right side of the handle on the shaft and align the mounting clamp screw. Insert the nut into the handle and tighten the screw to secure the mounting clamp.
Step 12: Insert the new throttle cable into the trigger. Next insert the spring then position the trigger on the mounting pin, making sure the spring is properly seated. You need to confirm that the cable is fully seated in the groove on the handle. Now align the left side of the handle and replace the screws to secure and be aware that if the handle is not properly oriented.
Step 13: You can loosen the handle mounting clamp screw to adjust the handle. Make sure that the throttle cable works properly then reattach the wire and boot to the spark plug.
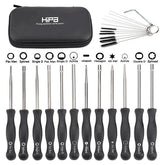
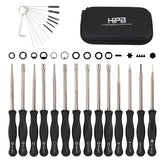
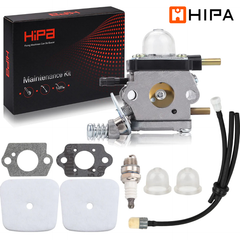
Revive Your Machine With Hipa All-In-One Kit
Hipa's parts kits make it quick and easy to maintain or restore your lawn and garden equipment. Whether you need replacement parts, tools, or help, Hipa has the small machine solution for you.


